Wrap It All! The 25 Best Paracord Handle Wraps

Though extremely popular now, rope handle wraps are not a new idea. Many of the weaves and knots listed here have been around since ancient times. They served many practical and decorative uses, and they still do—even in our high-tech world.
If you have been on this page before, we've recently updated it with even more tutorials that we previously had only images for.
Or, perhaps you are new to paracord crafting and handle wraps. If so, take a look at our color selection for finding the right cord for your first project. We also have a ton of paracording resource materials in the Paracorner to get you started.
Things That Can Be Wrapped in Paracord
While most people might be looking for handle wraps for their survival knives, handle wraps look good on most anything:
- Knife handles
- Steering wheels
- Axe handles
- Oars
- Walking sticks
- Bows
- Rifles
- Luggage handles
- Coffee mugs
- Jeep grab handles
- Stethoscopes (We're not kidding!)
- And many more!
25 Handle Wraps
I have attempted to make this list as complete as possible and have done my best to include alternate names for each knot/weave in the descriptions. That being said, I'm sure I've missed some.
Due to knots having more than one name, the wrapping methods are not ordered alphabetically. Instead they are grouped by concept and ordered by difficulty, starting with the easiest handle wraps. Press ctrl+f if you are on a descktop computer to search this post for a specific wrap listed.
Some of the pictures used are from our amazing Facebook fans. Credit is given below each picture.
- Quick Release (Common Whipping)
- Sword Wrap (Tsukamaki, Katatemaki)
- Fishtailing
- Simple Looping
- West Country Whipping
- Cobra
- Spiral/DNA
- French Hitching (Spiral Hitch)
- Moku Hitching
- St. Mary's Hitching
- Alternating Ring Hitching (Keckling)
- Ringbolt Hitching (1 strand)
- Ringbolt Hitching (2 strand)
- Zigzag Ringbolt
- Grafting
- Spanish Hitching (Underhand Grafting)
- Triaxial Weave
- Turk's Head
- Gaucho Knot
- Pineapple Knot
- Herringbone Knot
- Ginfer Knot
- Matthew Walker Knot
- Fish Scale Braid
- Chain Sennit (Monkey Braid)
- Corncob Braid
- Continuous Crowning (Crown Sennit)
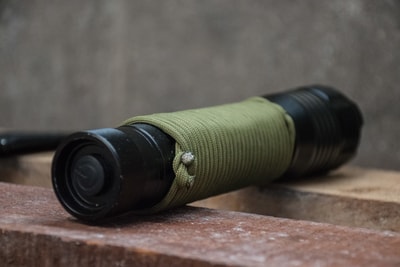
This method is merely a wrapping of rope around and around a handle. A special technique is used to secure your ends until you want to deploy your cord. Similar to a common whipping. Find instructions here or learn the common whipping knot.
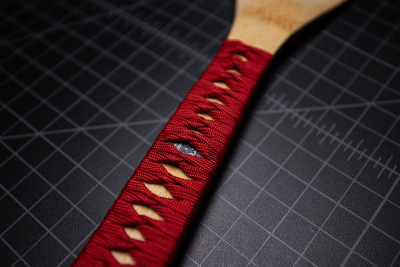
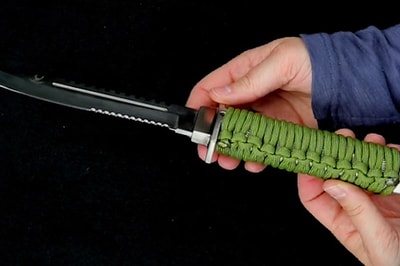
Very popular as a Japanese sword wrap, this method looks great on flat and oval handles. While this method is not usually done using paracord, we use coreless paracord to construct a version of a Tsukamaki wrap.
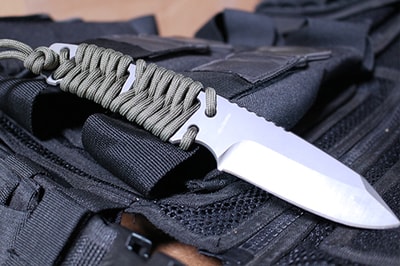
This wrap is great for survival knives that have holes in the handle. It's a simple weave that gives a nice look. Also works with two colors.
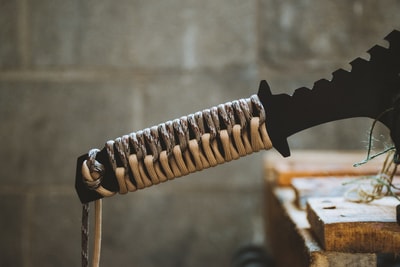
This one can hardly be considered a knot, but it makes a quick and excellent handle wrap just the same. Find out how to achieve this look here. Fun fact, this method is featured in the video game Counter Strike Global Offensive.
This is, essentially, a bunch of overhand knots. Often used on the end of ropes to keep it from fraying. This wrap is a very quick and easy way to make a very nice handle wrap. Make sure your knots are all tied the same direction to keep this wrap looking neat and even. We've got a photo and a video tutorial for this one.
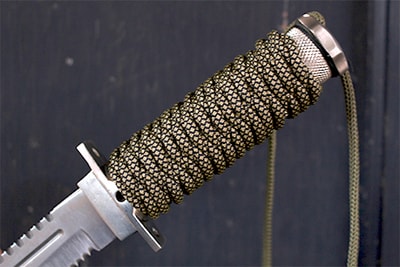
You probably knew this was the most popular bracelet weave, but did you know it could be used as a handle wrap? If you know how to make a cobra bracelet, you already know this one. Instead of weaving it around paracord strands, just do the same thing around your handle. This wrap is best on flat handles, but will work on round too. For a different look/grip you can orient the knotting on either the ridge or the flat side of the handle. Learn how to make the one in the picture with this video tutorial.
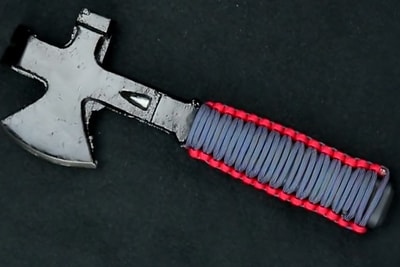
Believe it or not, this is just like the cobra weave, except you start the knot from the same side every time instead of alternating like for the cobra. This wrap is great for large diameter round handles such as canoe paddles.

Similar to both the cobra and the DNA, this one has a single spiral ridge that would look also look great on a canoe paddle or steering wheel. It involves making one overhand knot per pass around you handle. Tutorial can be found here.
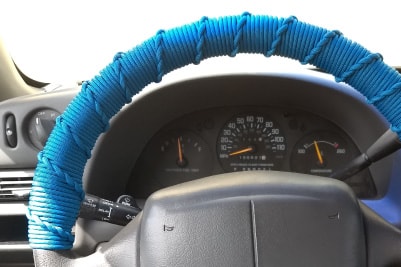
A little more difficult than French Hitching, the Moku has intersecting diagonal ridges. A cool look for sure!
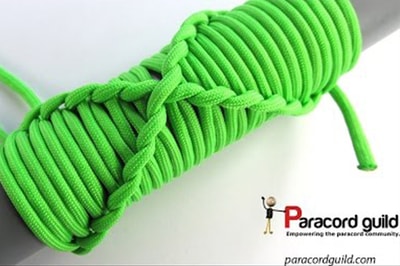
Yet another similar hitching, St. Mary's has a wider ridge that looks good with two or more colors.
Another very simple handle wrap. This one creates a single ridge running down the side. If you want instructions, check out this video.
Intended for use as padding on a metal ring, this knot can be repurposed to make a nice-looking handle wrap. This one is easier than it looks! Check out the tutorial. A variation of this weave has multiple ribs running down the handle. (rib stitch)
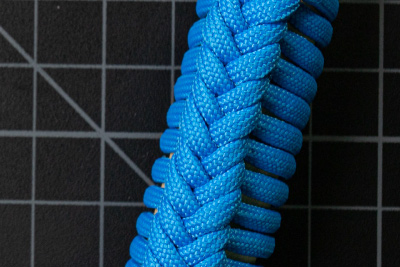
This version of the ringbolt has a distinct double ridge running down one side.
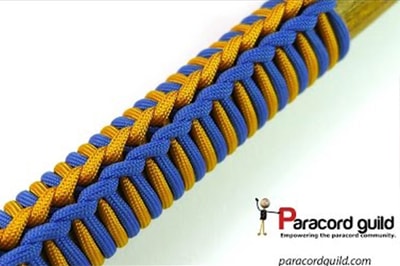
Similar in technique to the standard ringbolt, this hitch wrap has its own unique look. Works well with multiple colors. Find how to do it here.
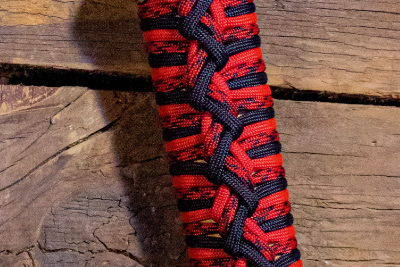
This is a weave in the traditional sense. Over under, over under. The one pictured is a slight modification of that pattern.
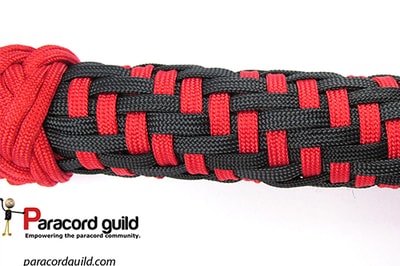
This is similar to a grafting weave, but instead of over under, you loop the vertical strands over and around the perpendiculars.
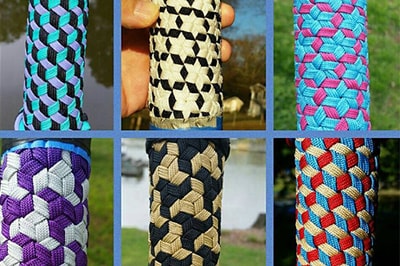
This is again the same idea as grafting, but instead of two strands at a right angle, this one uses three directions of intersecting strands. The result is an amazing 3D look that people won't believe is hand made. (top left) Can you say Q-Bert? Many different varieties of this weave create different patterns such as a star triaxial. (top right and middle)You'll probably want to use coreless paracord for these.
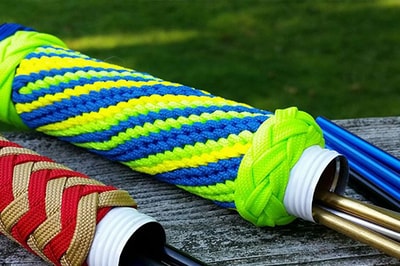
This multi-functional knot has many different variations for making anything from bracelets to pot holders. It is often used in conjunction with other handle wraps to cover the stray ends of a different weave. Many varieties of this knot exist that will give your handle very different looks. Learn how to make the pictured Turk's head here. The next few wraps are versions of the Turk's head—or at least near cousins.
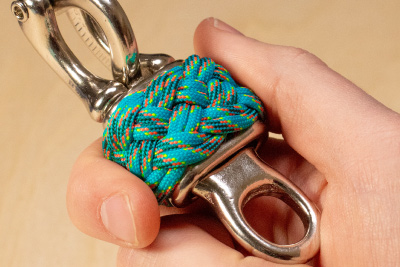
Not to be confused with the mustached Marx brother, this knot is built on the foundation of a Turk's head. Named after the Gauchos (Cowboys) of Argentina, this knot looks great in leather or paracord. Learn how here.
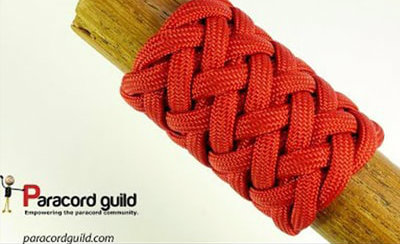
Oh, the ever-popular pineapple turk's head. This one is best made with coreless paracord as well. Learn how to make our fun twist on the paracord pineapple knot.
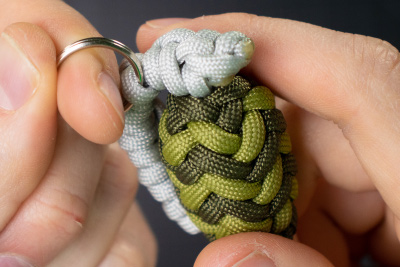
Technically a form of a turk's head, this knot has a nice even wavy appearance. Looks very nice with two or more colors.
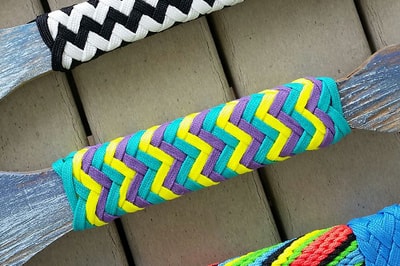
This tight knot is nice and thick. Another option for finishing off the ends of your handle wrap. Looks good with coreless paracord. Paracord Guild strikes again with this good tutorial.
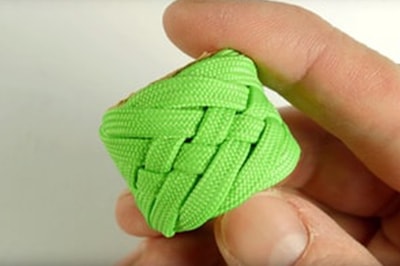
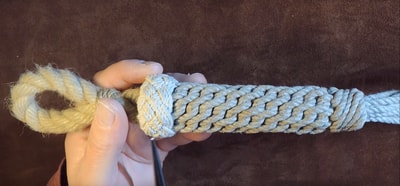
Not often used as a handle wrap, this knot has a nice finished look that is hard to beat. A great way to finish off the end of your wrapped handle.If you're new to this knot, start with a 4 Strand Matthew Walker.
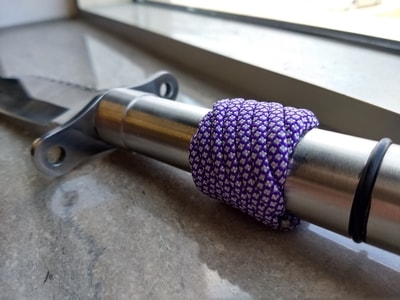
This tight weave makes a tight, uniform handle wrap that is definitely worth the extra time it takes to make it. (and it DOES take a lot of time.) Get started by watching our video tutorial. We recently remade this one as the old tutorial was hard to follow.
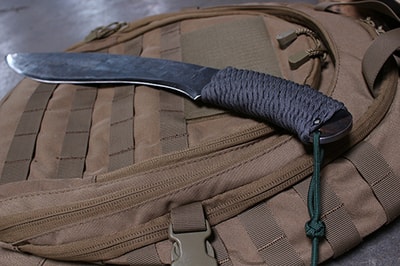
Often used as a tangle-free method to store thick rope or power cords, rows of this knot can be linked together, making a good wrap for wide-diameter objects, such as a water bottle. This method is very similar in concept to crocheting. This wrap is quick deploy.You can also wrap each pass of the knot around your handle for a drastically different look that looks more like hitching. Another Paracord Guild tutorial.

This handle wrap has a distinct bumpy texture that gives a firm grip to round handles. Instructions here.
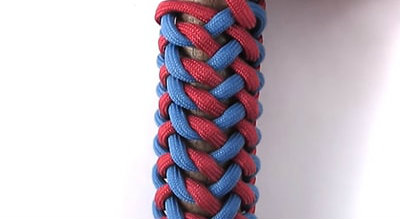
This complicated wrap looks especially amazing with a small diameter rope or paracord. You will probably want a turks head knot on the end to finish this one off. Be prepared for your fingers to be numb. A tight wrap requires a lot of rope-pulling. Youtube instructions for the pictured one here.
A Couple of Notes:
- While these wraps can be adapted to many applications, some of them are better suited for either round or flat handles. The pictures should give you a pretty good idea of which are which.
- With any of these wraps, tightening as you go is important. However, if you used paracord and get to the end of your wrap and it is still a little loose, soak the handle in warm water for a few seconds to shrink the paracord and tighten the weave.
- Did I mention that you can now find coreless paracord in our store?
- Some of these weave require the use of fid needles. These are useful in many kinds of paracord projects where cord has to be threaded through tight spaces.
- Here is our current list of paracord colors and sizes. Be sure to check back as we are frequently adding more!
Am I missing any handle wrap varieties? We would love to hear about any others that you have seen or used!
I already know I am missing:
- half hitching
- square knot netting
- globe knots
- french sinnet
- spanish ring knot
Maybe these will be covered in a future post.
Get paracord crafting tutorials and inspiration straight to your inbox. Subscribe to our newsletter at the bottom of this page!
Updated 3-11-21

